5.9 KiB
Amazon Web Services
This quickstart shows you how to set up the Coder server on AWS which will provision AWS-hosted, Linux workspaces.
Requirements
This quickstart assumes you are assigned the AdministratorAccess policy on AWS.
Setting Up Security Groups for EC2
To set up a security group for an EC2 instance, navigate to the AWS EC2 Dashboard. In the side panel click Security Groups.
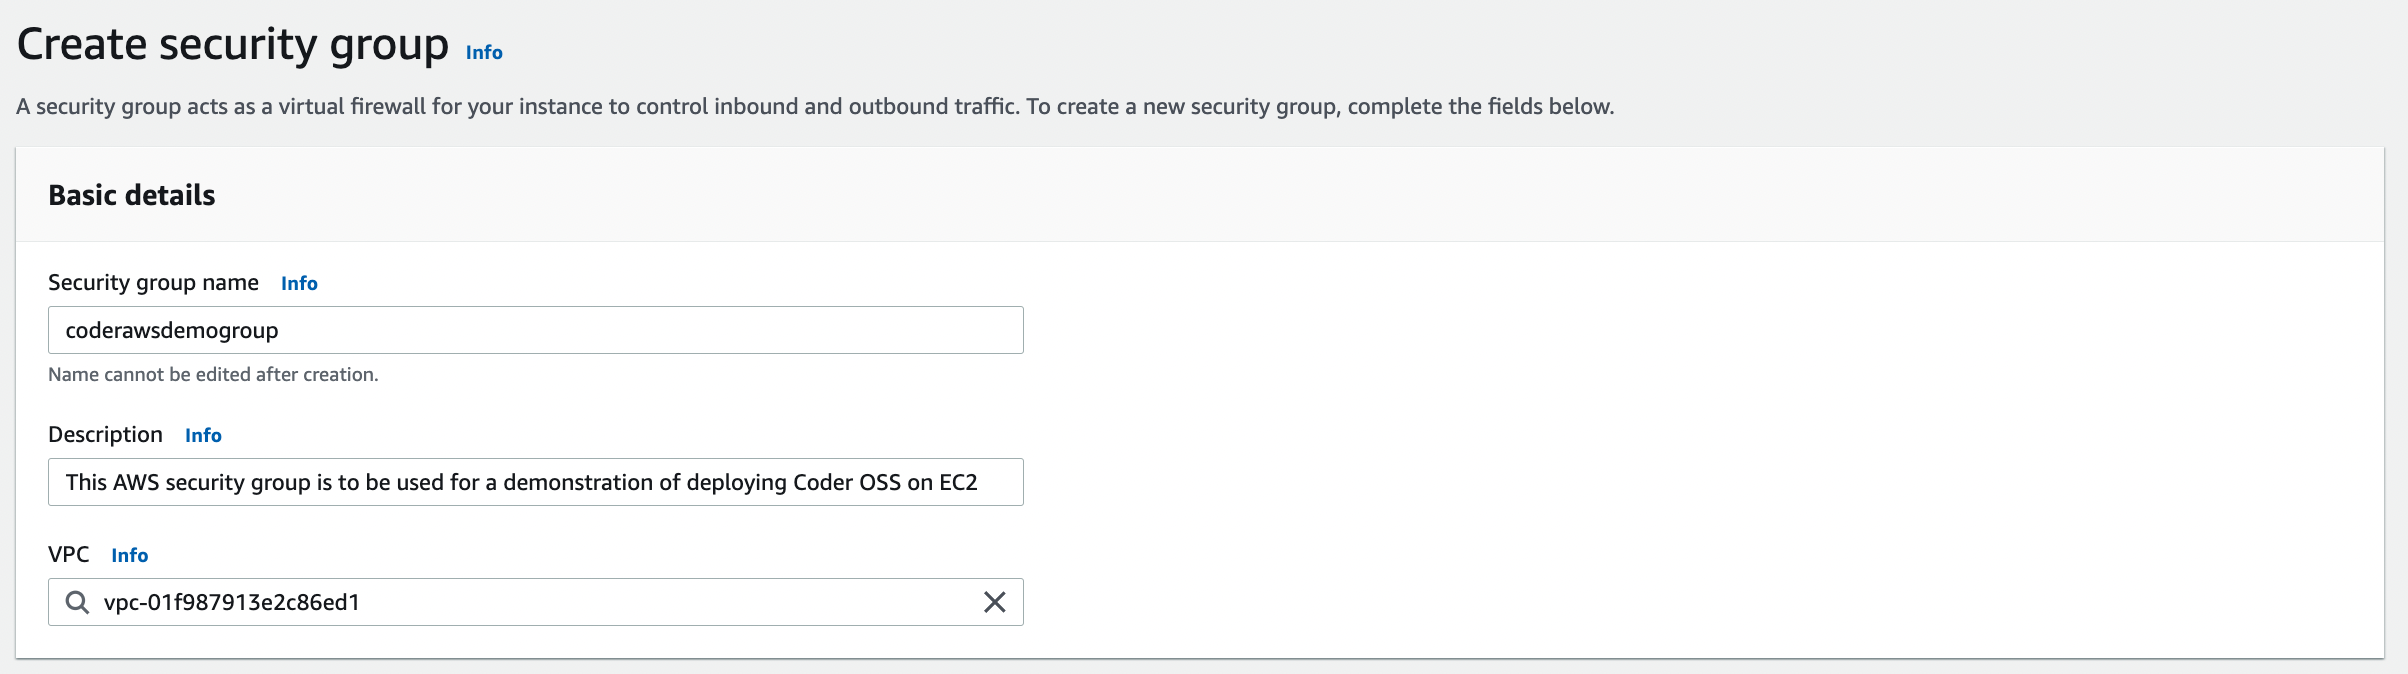
In the upper right hand corner, click Create Security Group. In the creator screen, name the security group something relevant to the EC2 instance you will create.
For ease of use, we are going to set this up using the simplest rules.
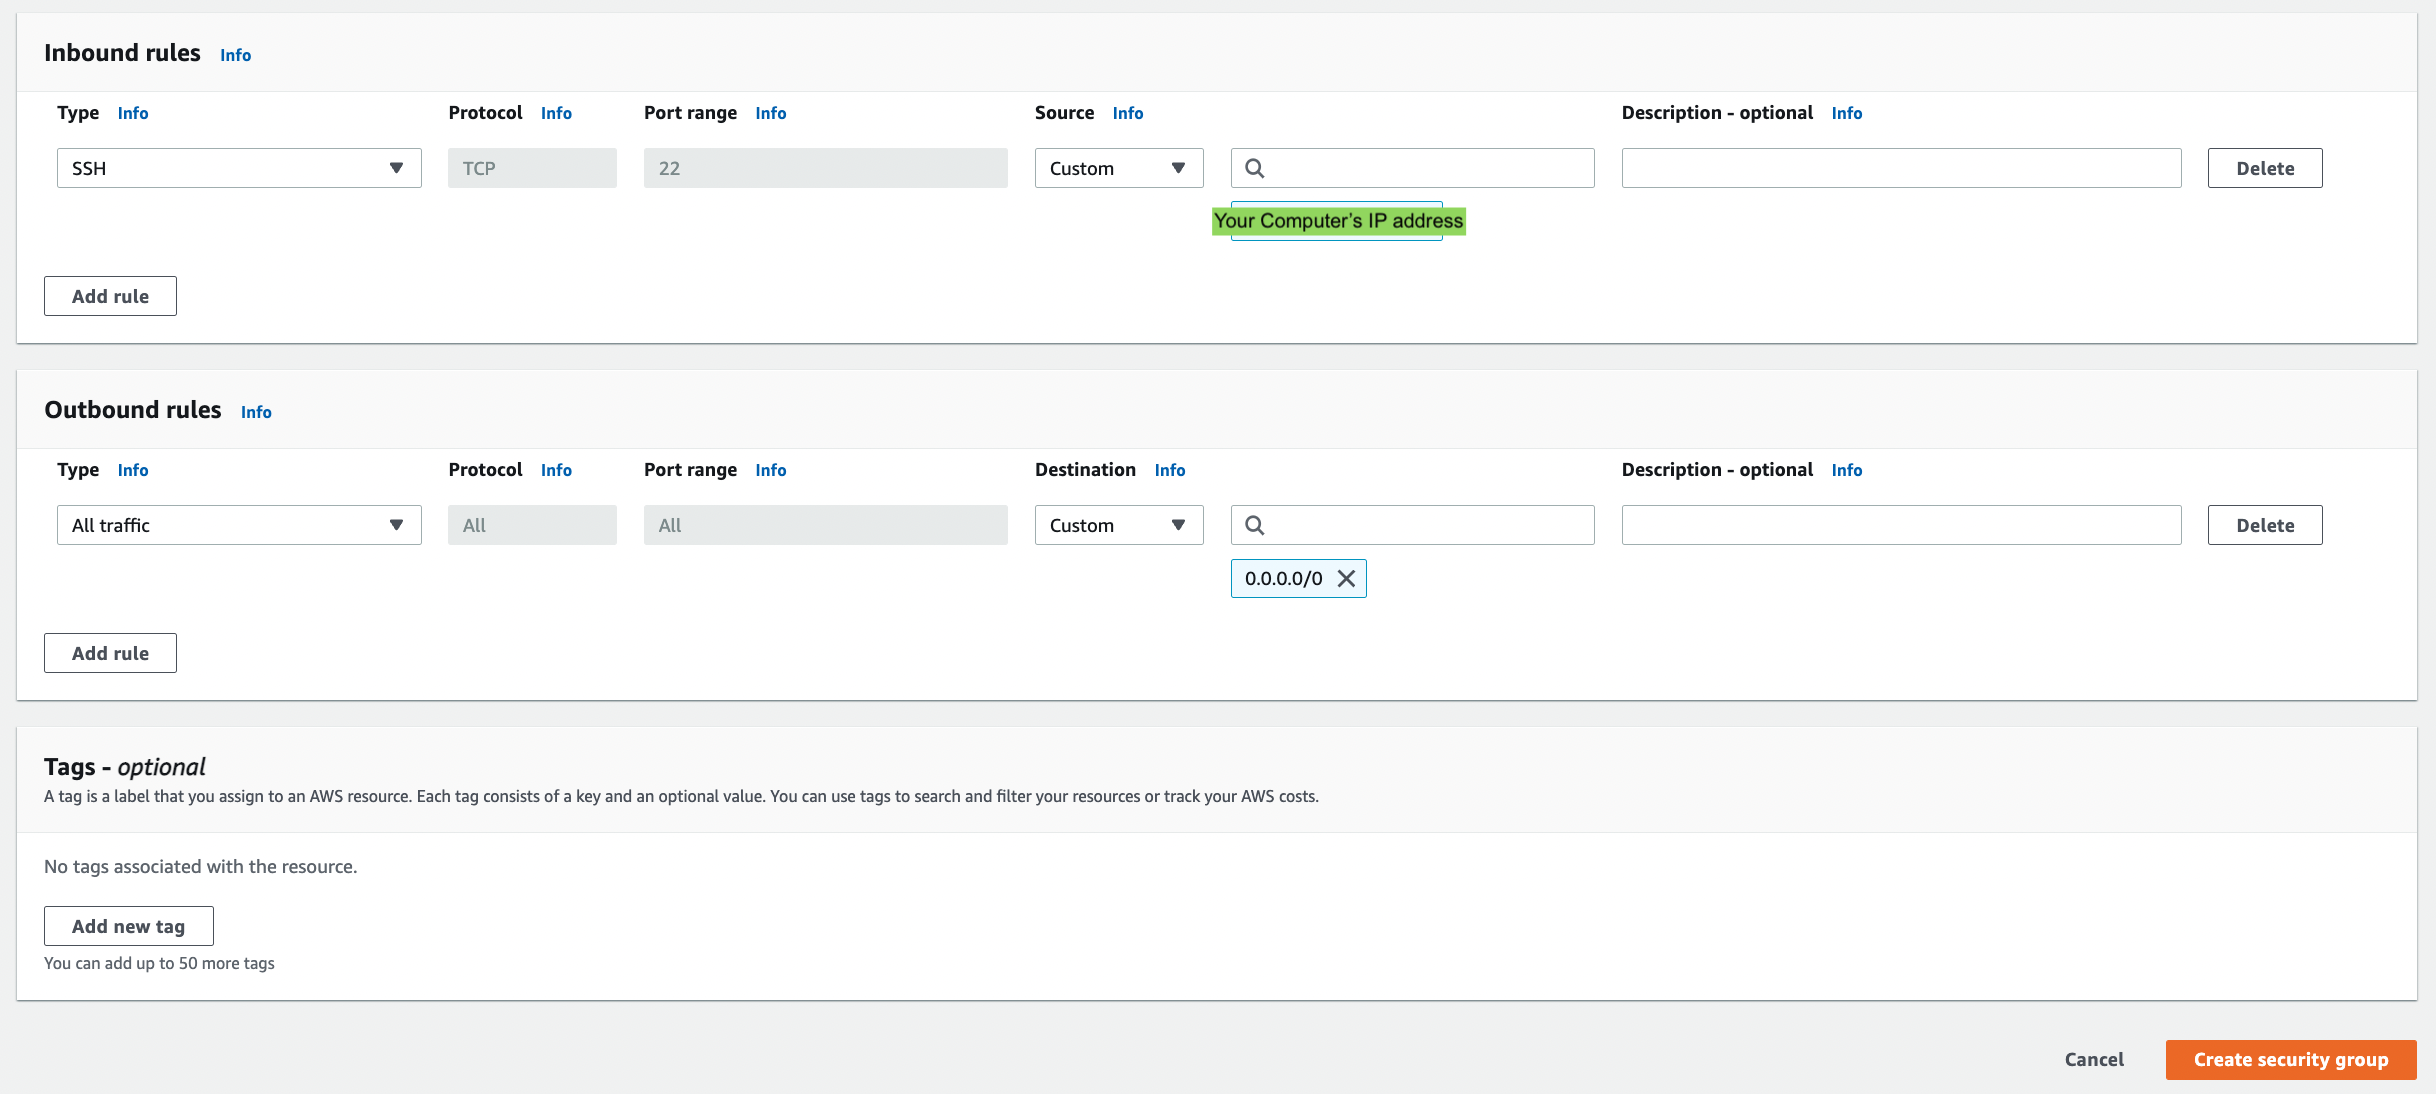
Create a new Inbound Rule that allows for SSH from your computer’s IP address.
You’ve now created a security group that will be used by your EC2 instance.
Setting Up Your EC2 instance
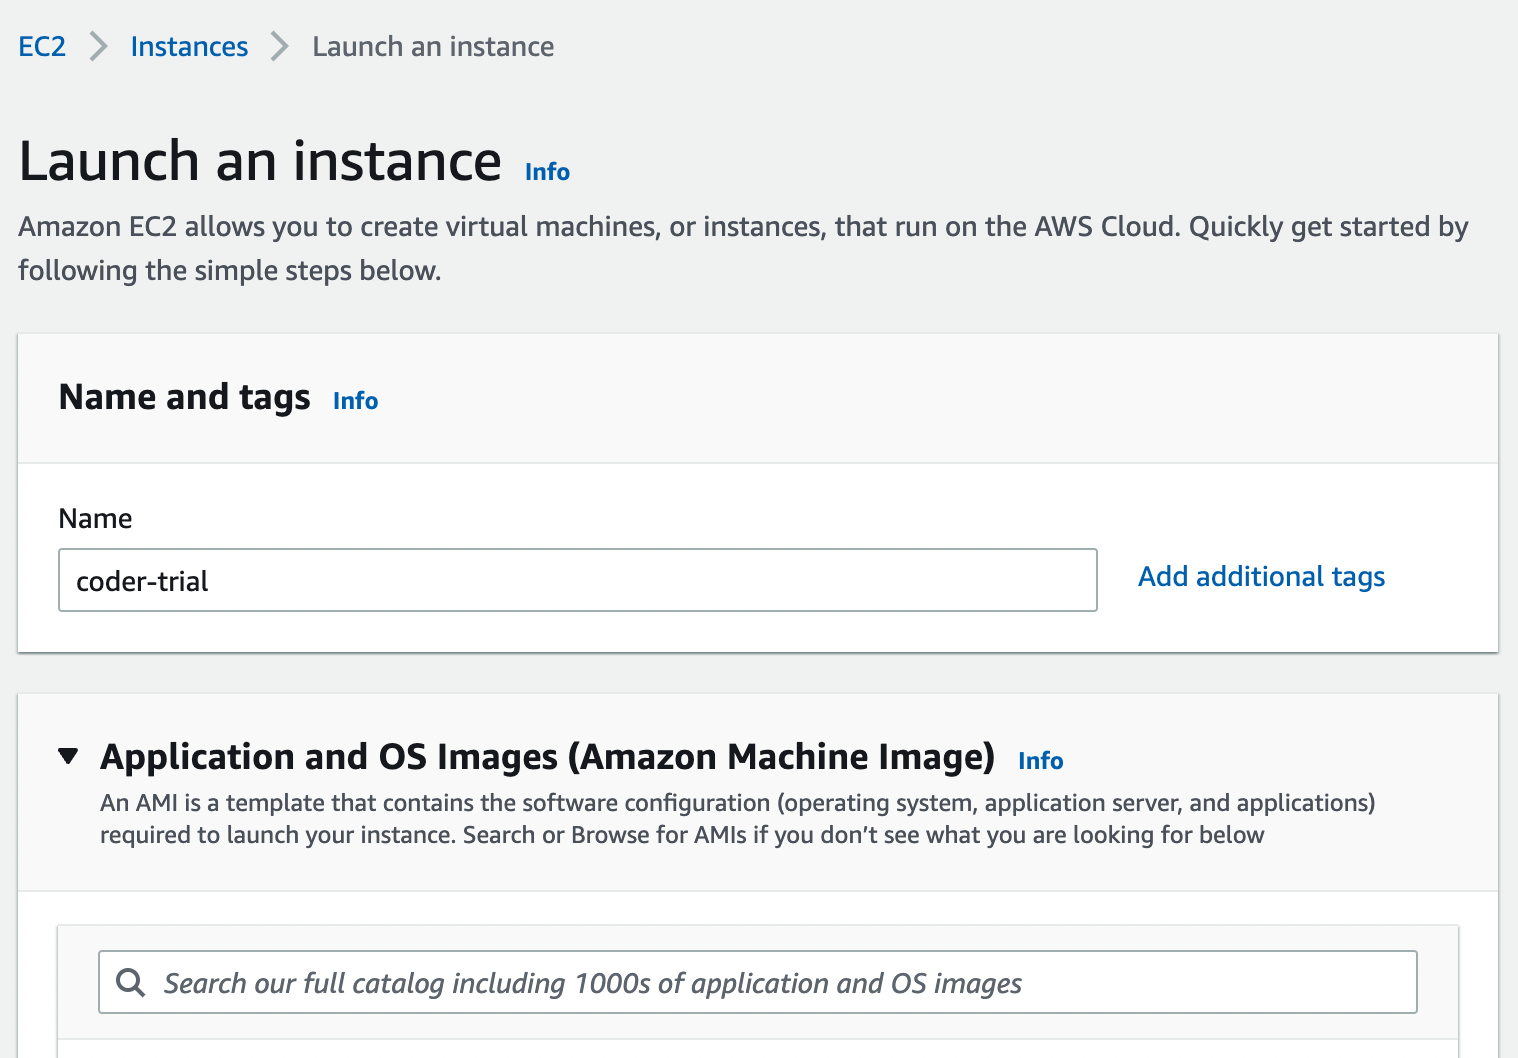
On the EC2 dashboard, click Instances. This will take you to all the EC2 instances you have created. Click Launch New Instance. Name the EC2 instance following the naming convention of your choice.
For this tutorial, we are going to launch this as the base Ubuntu server.
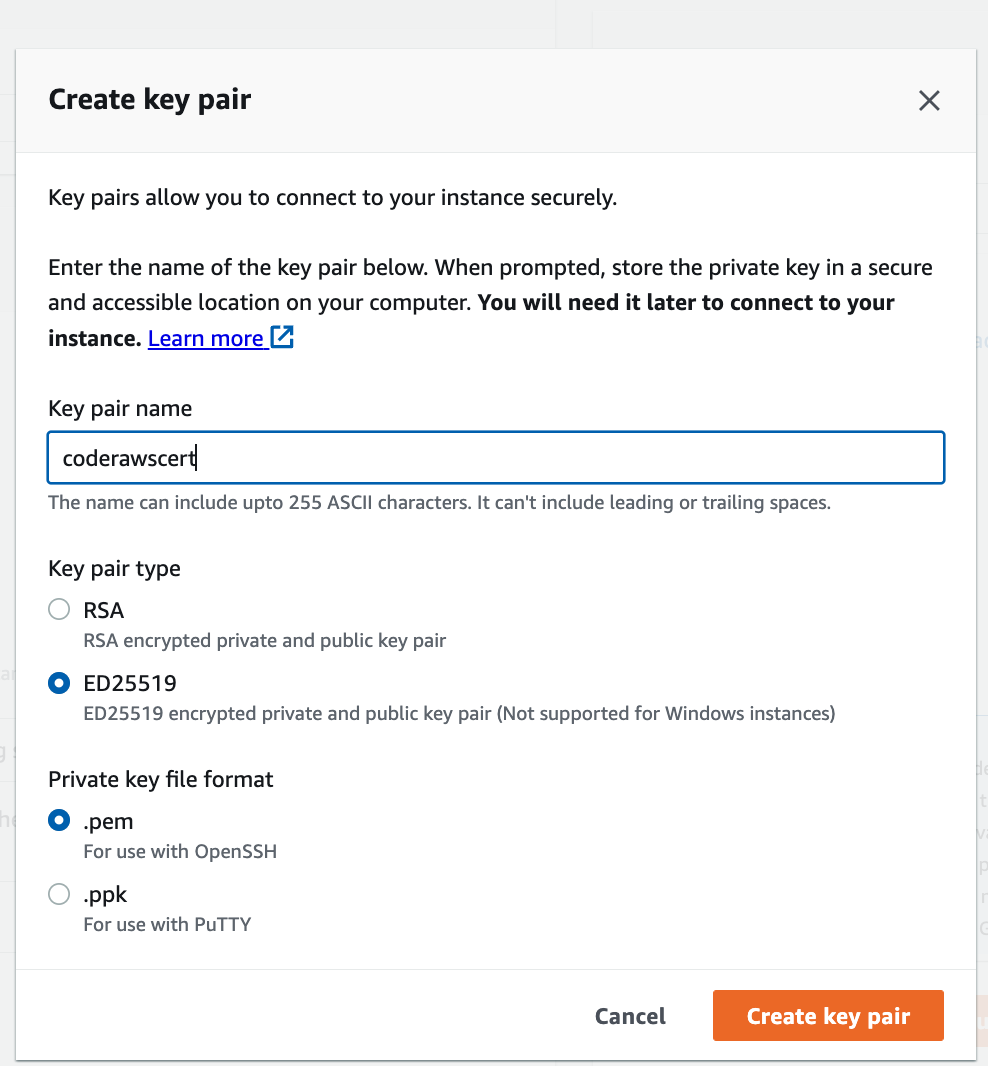
For the Create key pair, we are using ED25519 and .pem as we will SSH into the instance later in the tutorial.
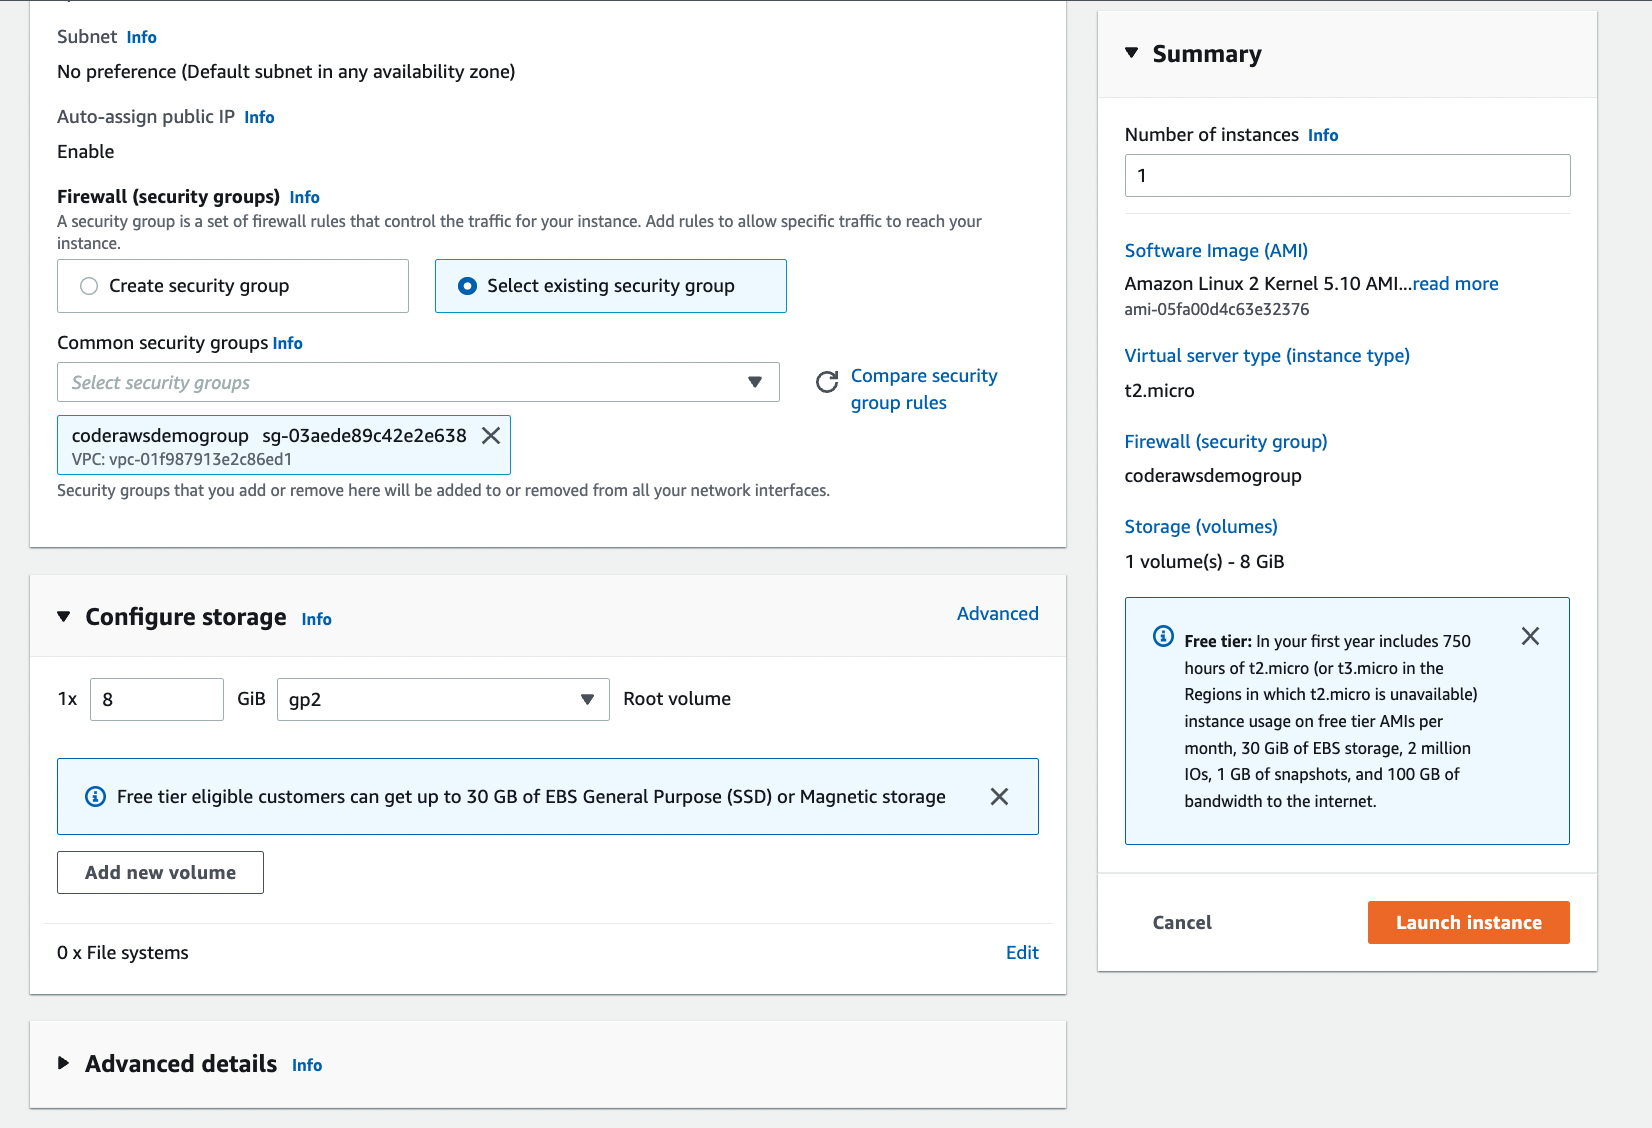
Next, under Network Settings, change your Firewall security group to Select existing security group and from the resulting dropdown, select the security group you created in the previous section.
You don’t need to change anything else - click Launch Instance.
It’ll take a few minutes for it to show up in your existing instances, so take a break as it starts up.
SSHing into the EC2 instance
If you’ve launched a new EC2 instance following the previous steps of this tutorial, find the username for the EC2 instance here. The version launched in the previous steps was a version of the Amazon Linux so the username is ubuntu.
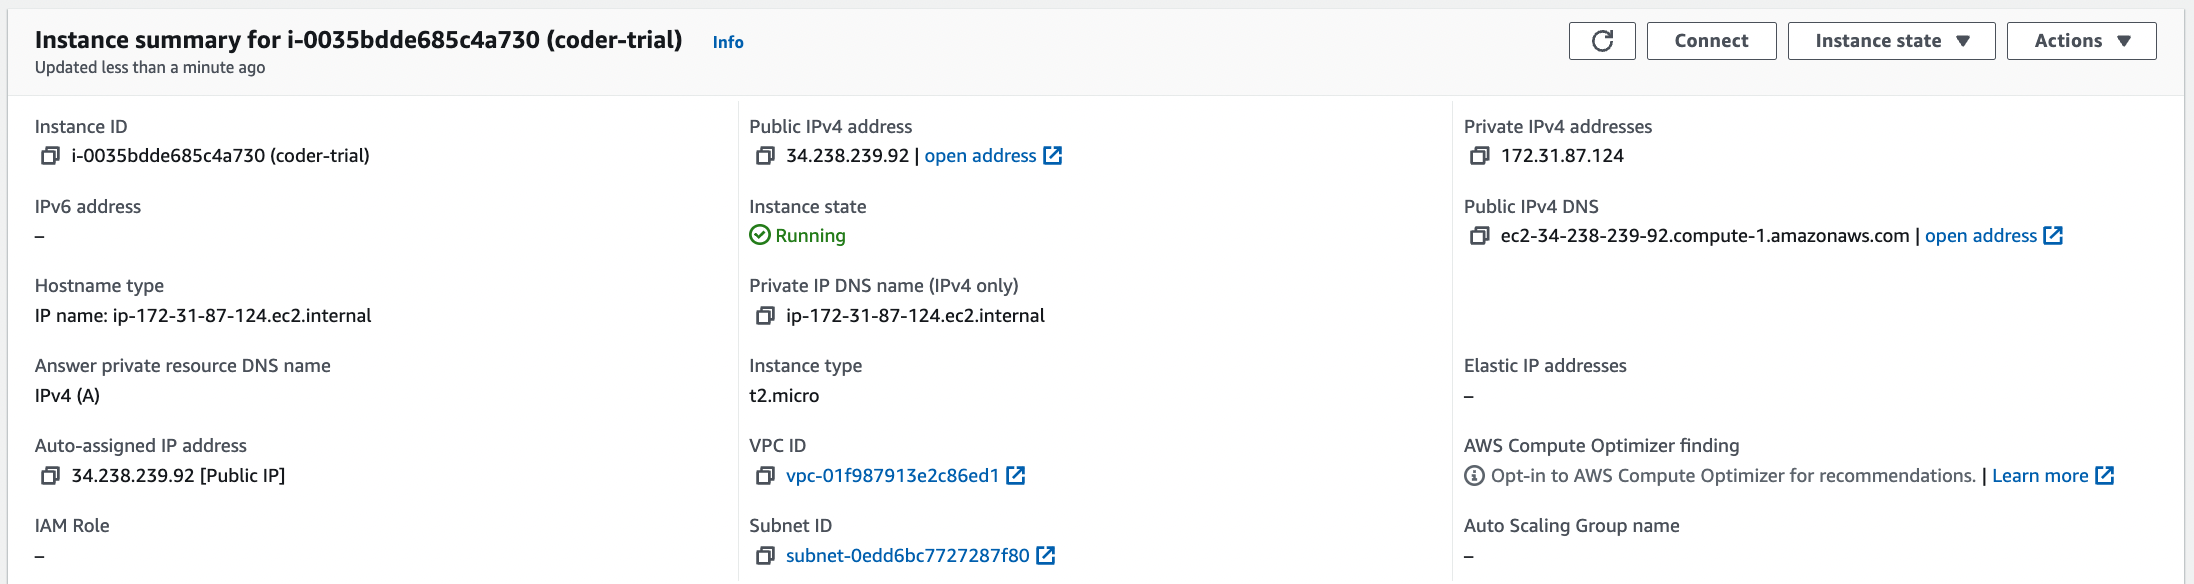
You will also need the IP address of the server. Click on the server in the Instances dashboard, and copy the IPv4 address
Now that we’ve gathered all the information you will need to SSH into your EC2 instance, on a terminal on your local system, navigate to the .pem file downloaded when you created the EC2 instance. Run the following command:
chmod 400 [mykey].pem
This adds the required permissions for SSH-ing into an EC2 instance.
Run the following command in terminal, where mykey is the security key file, username is the username found above for the relevant EC2 operating system image, and the ip-address is the IPv4 address for the server:
ssh -i [mykey].pem username@ip-address
Congrats you’ve SSH’d into the server.
Install Coder
For this instance, we will run Coder as a system service, however you can run Coder a multitude of different ways. You can learn more about those here.
In the EC2 instance, run the following command to install Coder
curl -fsSL https://coder.com/install.sh | sh
Run Coder
Run the following command to start Coder as a system level service:
sudo systemctl enable --now coder
The following command will get you information about the Coder launch service
journalctl -u coder.service -b
This will return a series of Coder logs, however, embedded in the launch is the URL for accessing Coder.
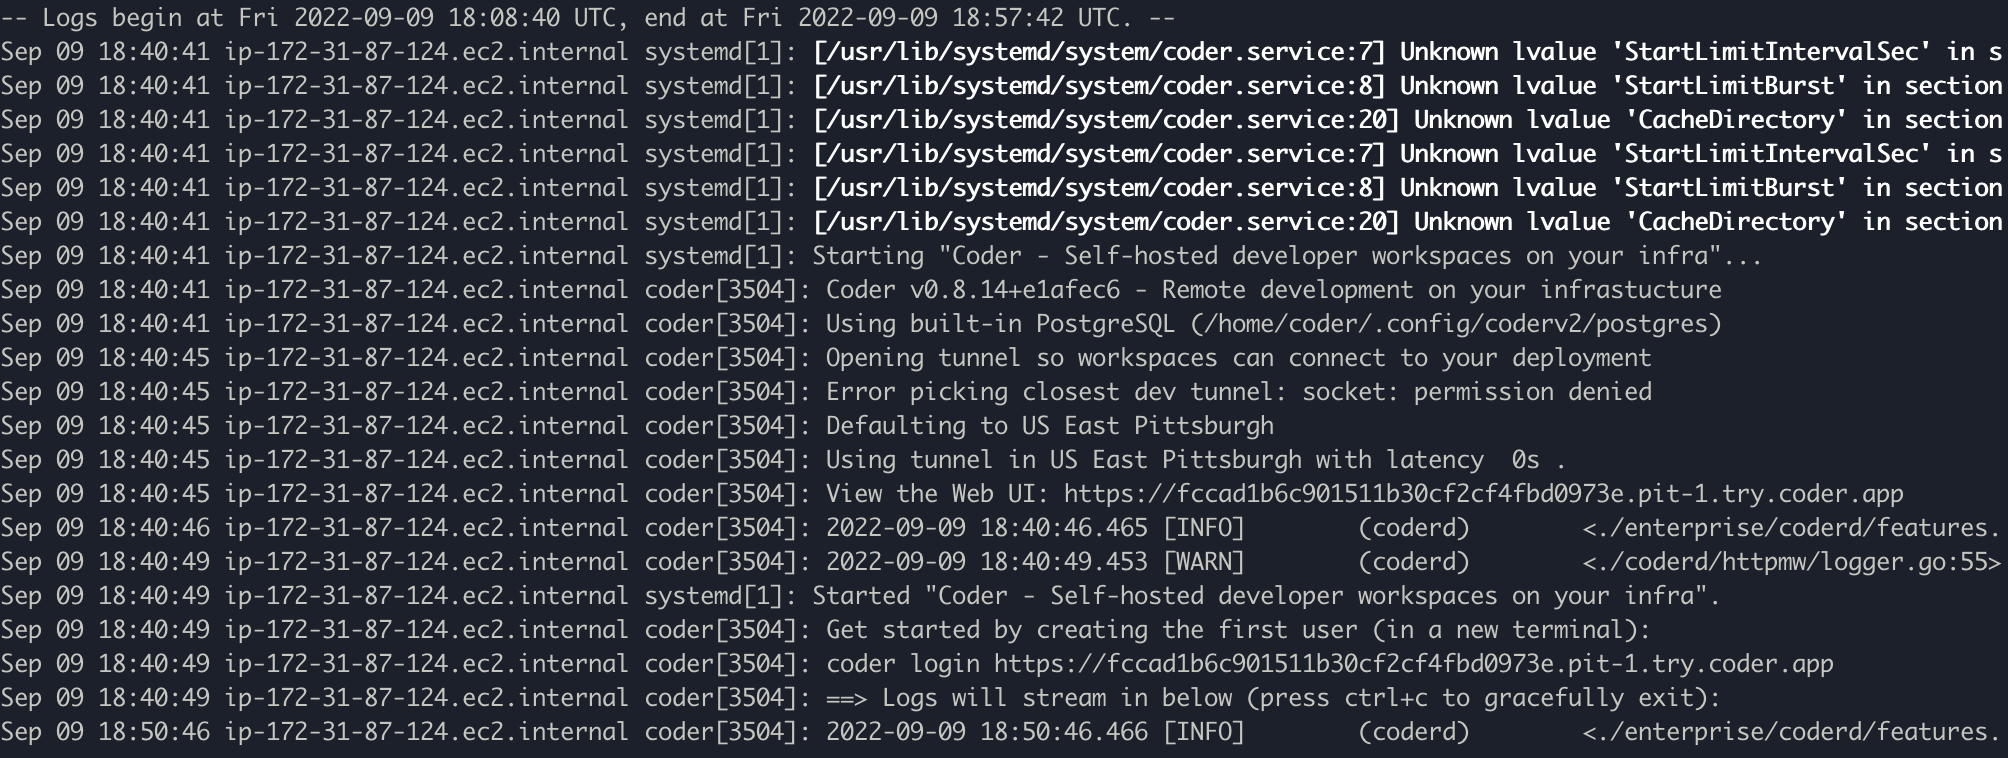
In this instance, Coder can be accessed at the url https://fccad1b6c901511b30cf2cf4fbd0973e.pit-1.try.coder.app.
Copy the URL and run the following command to create the first user, either on your local machine or in the AWS EC2 instance terminal.
coder login <url***.try.coder.app>
Fill out the prompts. Be sure to save use email and password as these are your admin username and password.
You can now access Coder on your local machine with the relevant ***.try.coder.app URL and logging in with the username and password.
Creating and Uploading Your First Template
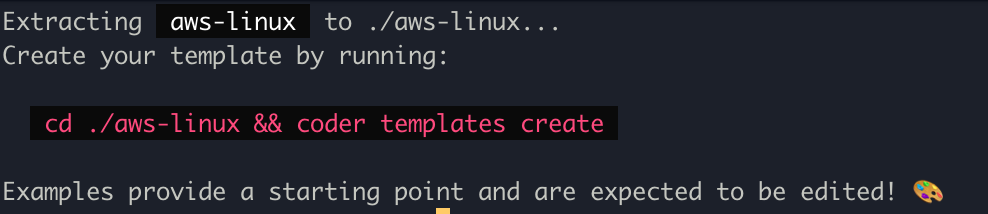
Run coder template init to create your first template. You’ll be given a list of possible templates. This tutorial will show you how to set up your Coder instance to create Linux based machines on AWS.
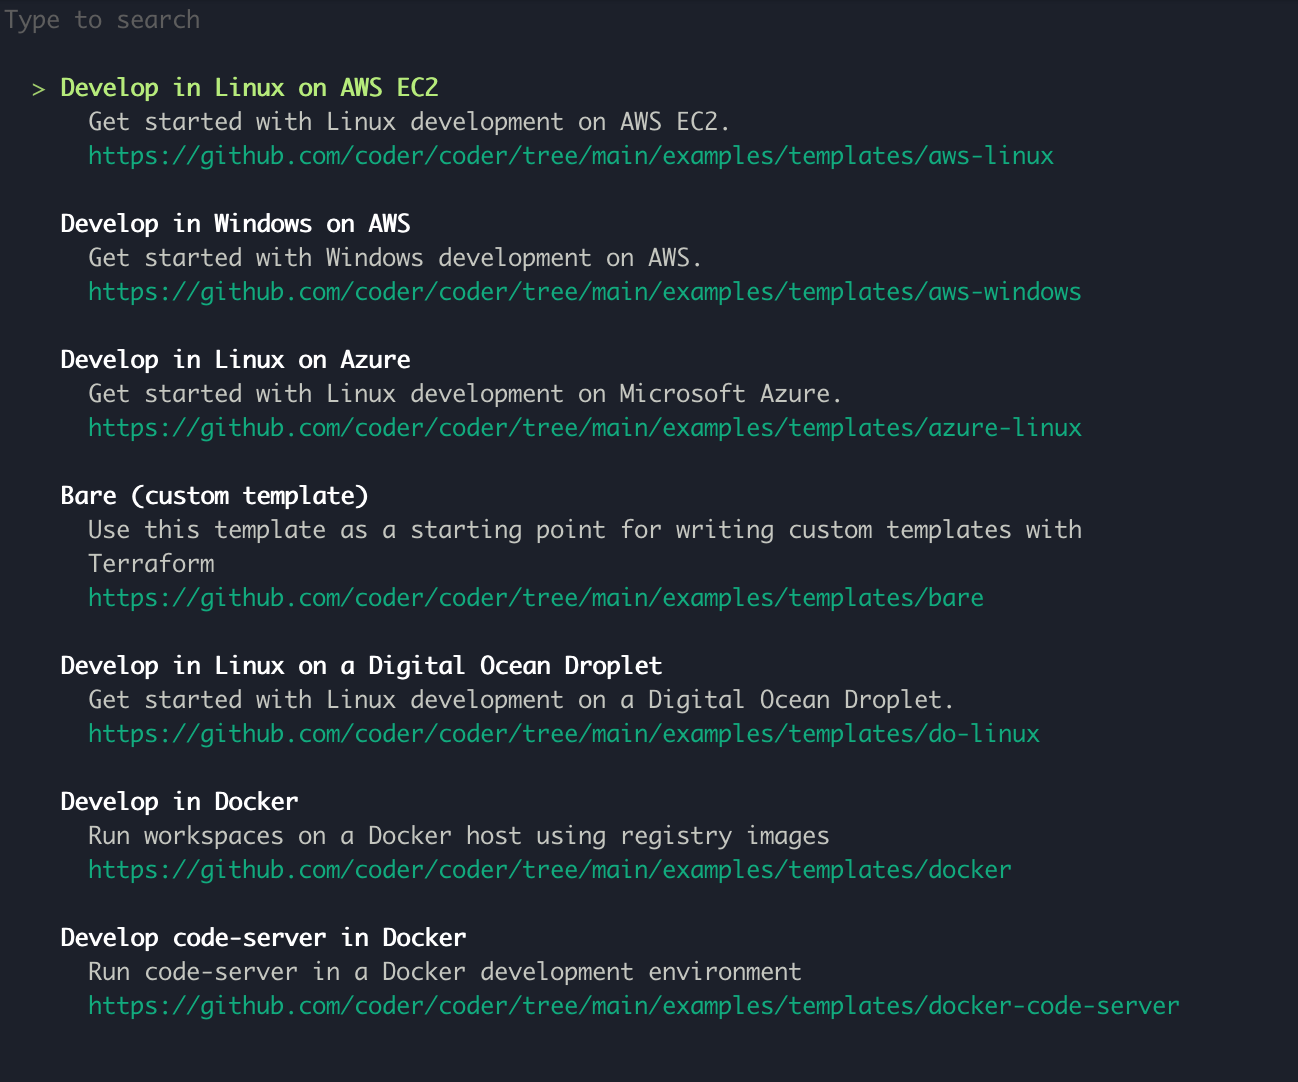
Press enter to select Develop in Linux on AWS template. This will return the following:
Now, we must install the AWS CLI and authorize the template. Follow these instructions to install the AWS CLI and add your credentials.
Coder runs as a system service under a system user coder. The coder user will require access to the AWS credentials to initialize the template and provision workspaces.
Run the following command to create a folder for the AWS credentials to live in:
sudo mkdir /home/coder/.aws
Run the following commands to copy the AWS credentials and give the coder user access to them:
sudo cp ~/.aws/credentials /home/coder/.aws/credentials
sudo chown coder:coder /home/coder/.aws/credentials
Navigate to the ./aws-linux folder where you created your template and run the following command to put the template on your Coder instance.
coder templates create
Congrats! You can now navigate to your Coder dashboard and use this Linux on AWS template to create a new workspace!