3.6 KiB
JetBrains Gateway
JetBrains Gateway is a compact desktop app that allows you to work remotely with a JetBrains IDE without even downloading one. See JetBrains' website to learn about and Gateway.
Gateway can connect to a Coder workspace by using Coder's Gateway plugin or manually setting up an SSH connection.
Using Coder's JetBrains Gateway Plugin
The Coder plugin is an alpha state. If you experience problems, please create a GitHub issue or share in our Discord channel.
- Install Gateway
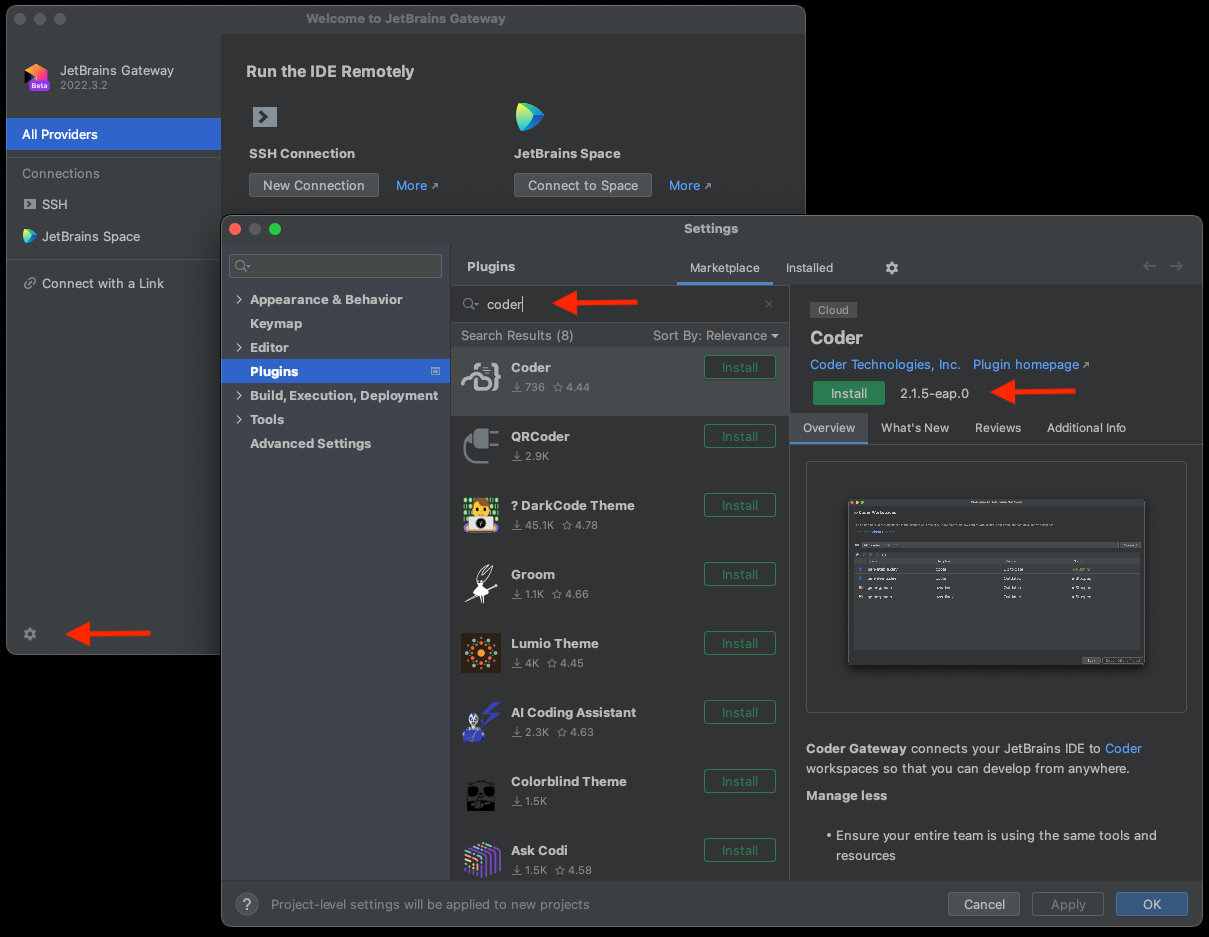
- Open Gateway and click the gear icon at the bottom left and then "Settings"
- In the Marketplace tab within Plugins, type Coder and then click "Install" and "OK"
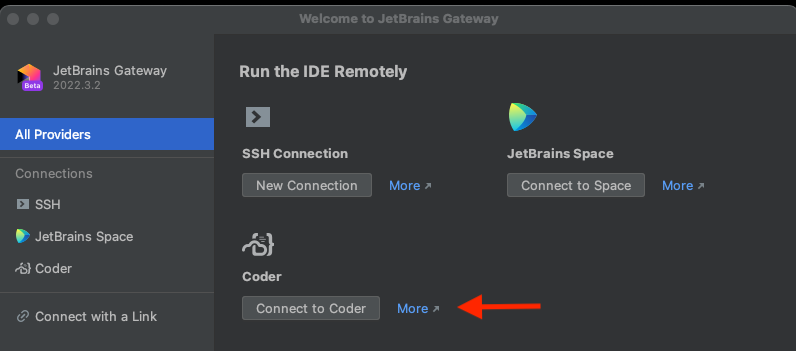
- Click the new "Coder" icon on the Gateway home screen
- Enter your Coder deployment's Access Url and click "Connect" then paste the Session Token and click "OK"
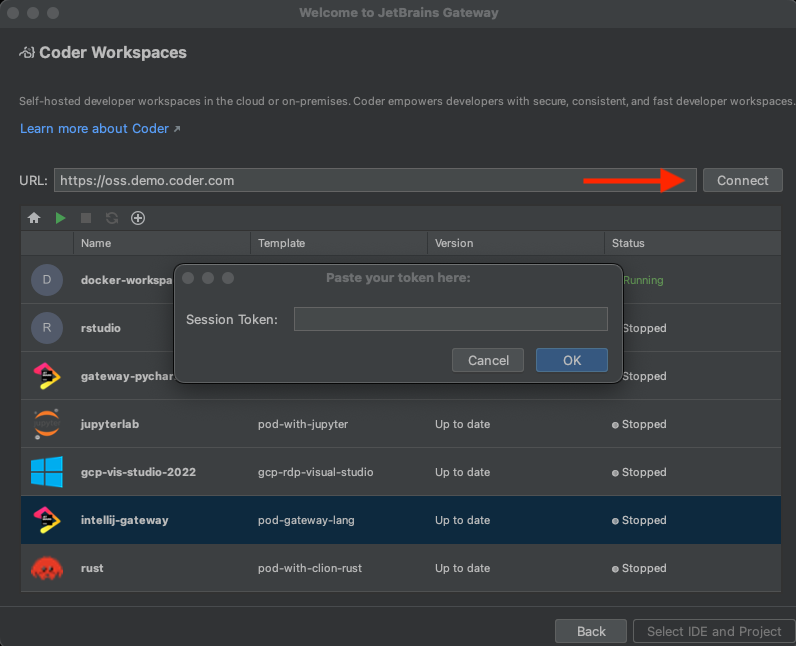
- Click the "+" icon to open a browser and go to the templates page in your Coder deployment to create a workspace
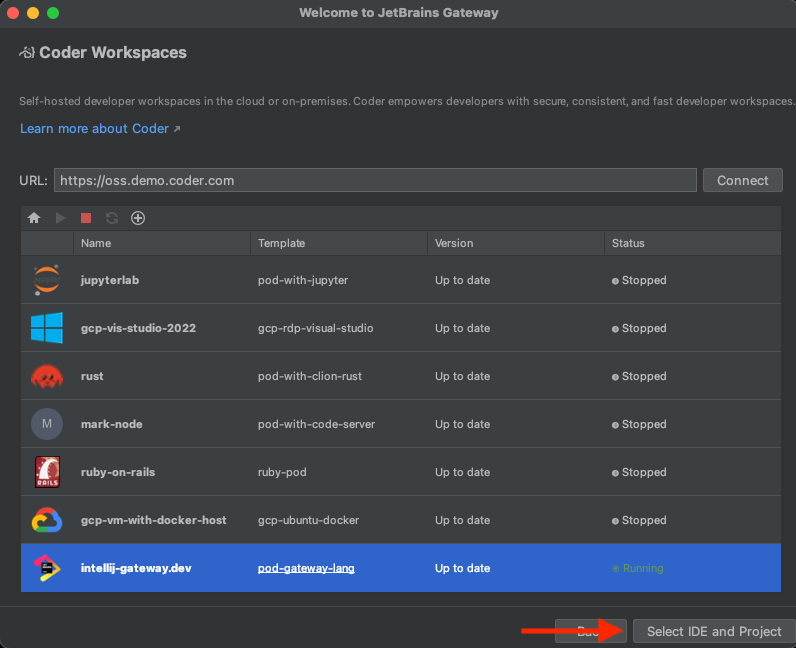
- If a workspace already exists but is stopped, click the green arrow to start the workspace
- Once the workspace status says Running, click "Select IDE and Project"
- Select the JetBrains IDE for your project and the project directory then click "Start IDE and connect"
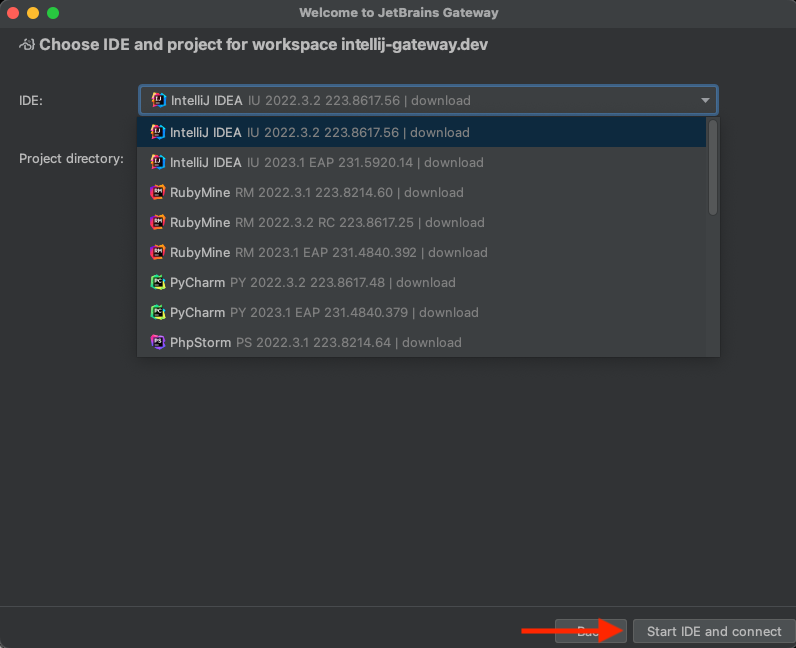
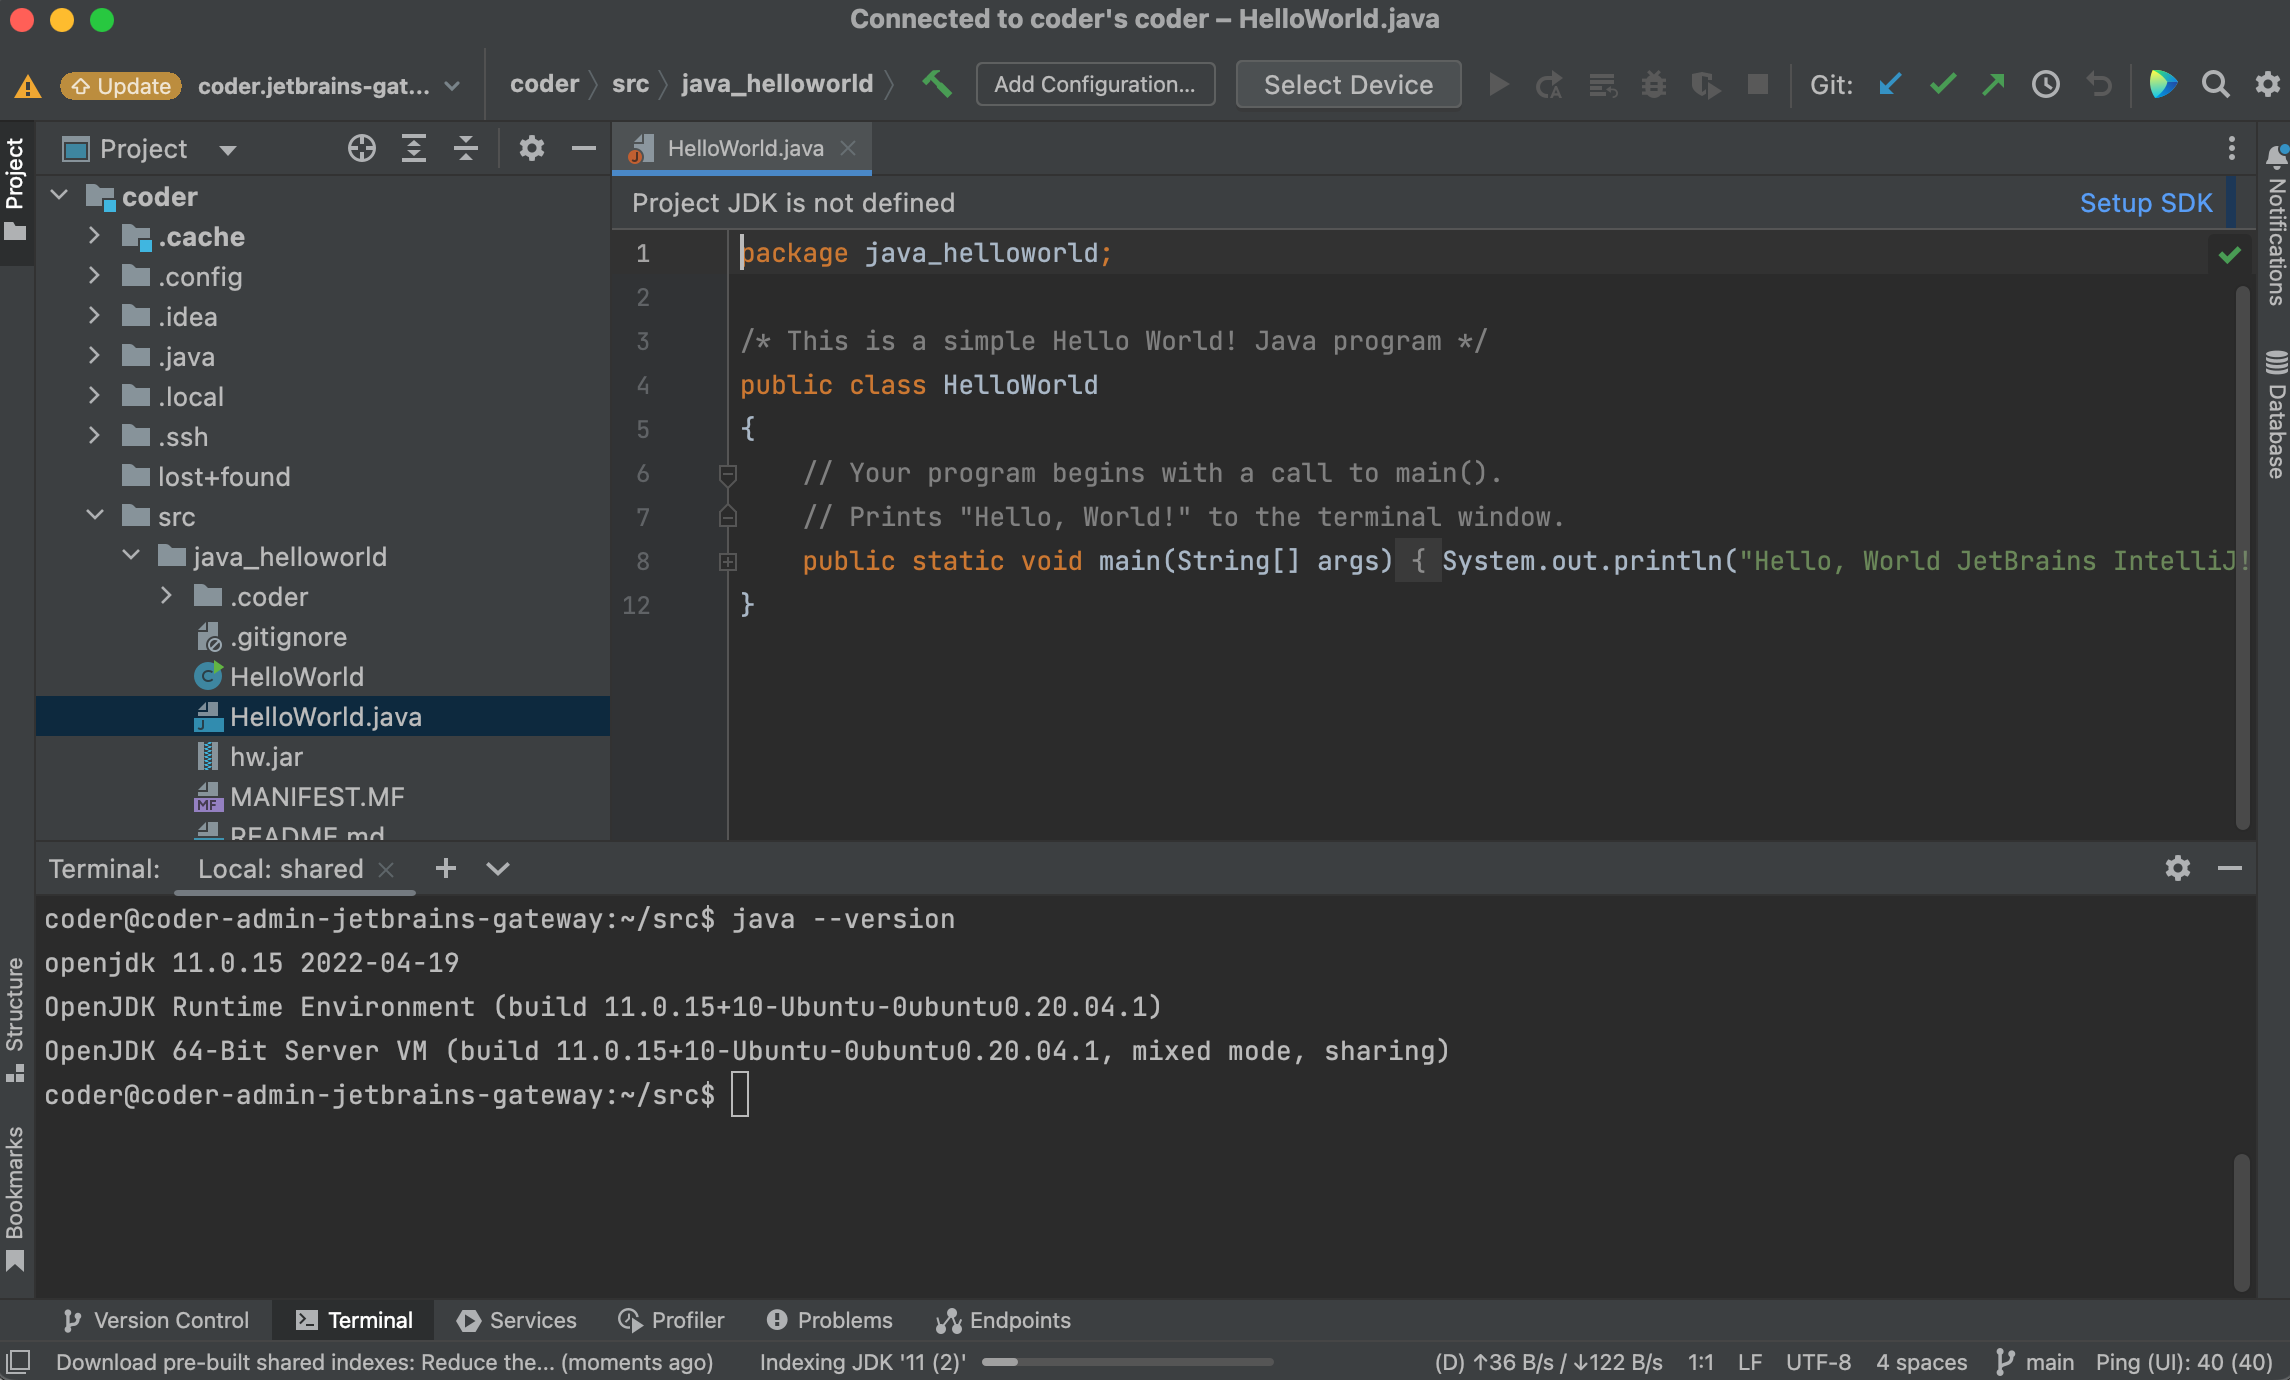
Note the JetBrains IDE is remotely installed into
~/. cache/JetBrains/RemoteDev/dist
Creating a new JetBrains Gateway Connection
-
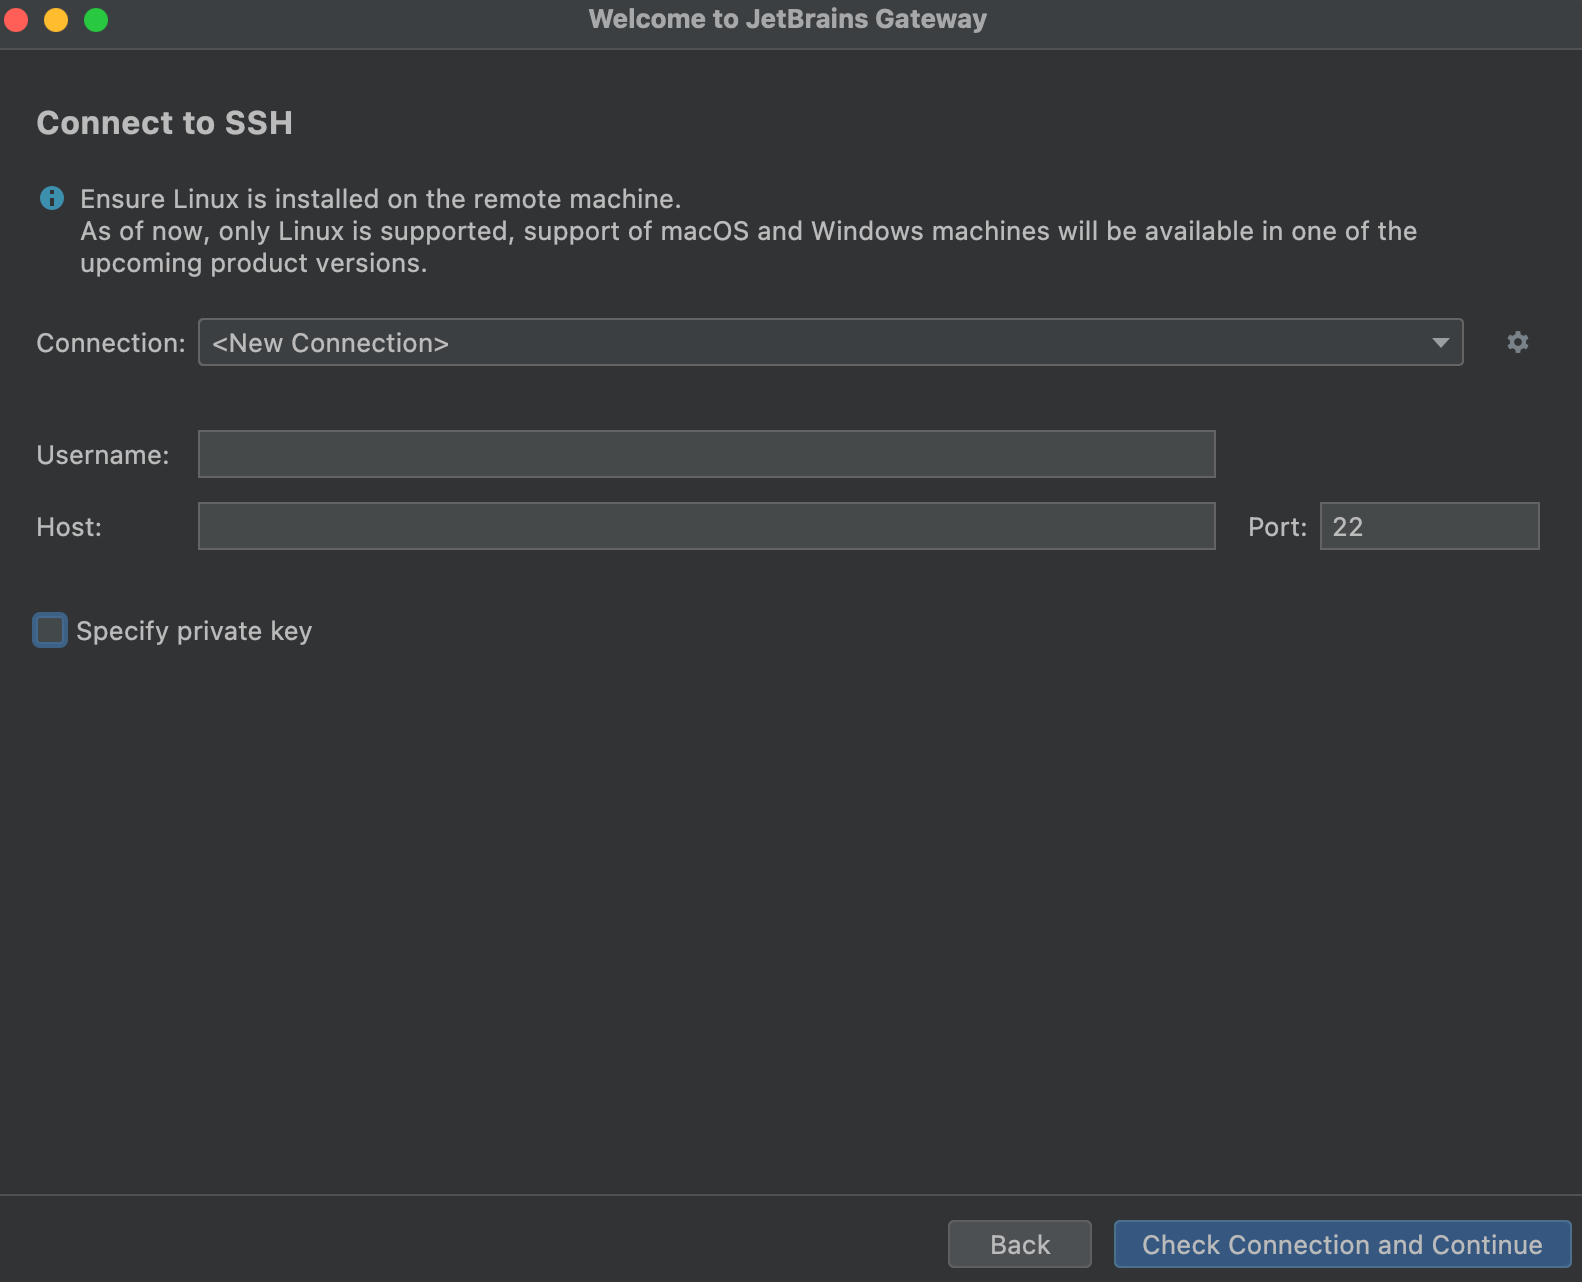
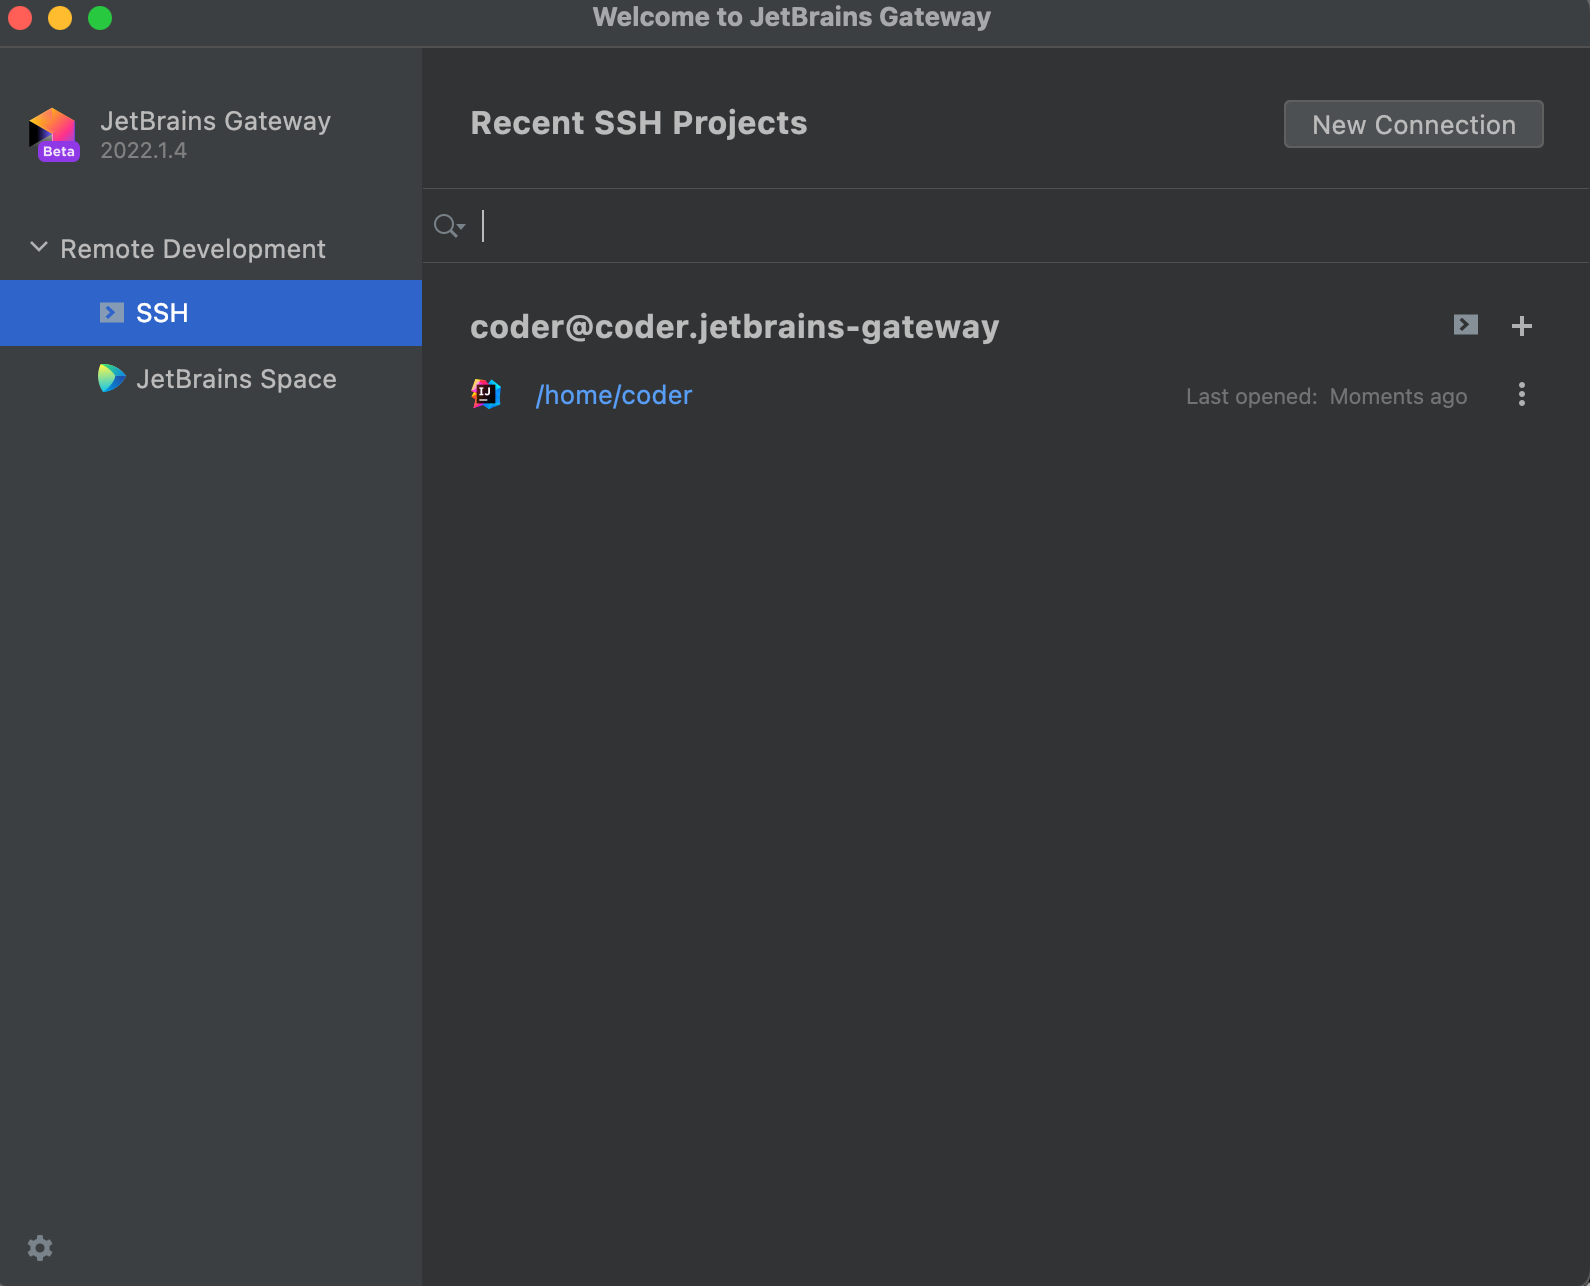
Open Gateway, make sure "SSH" is selected under "Remote Development"
-
Click "New Connection"

-
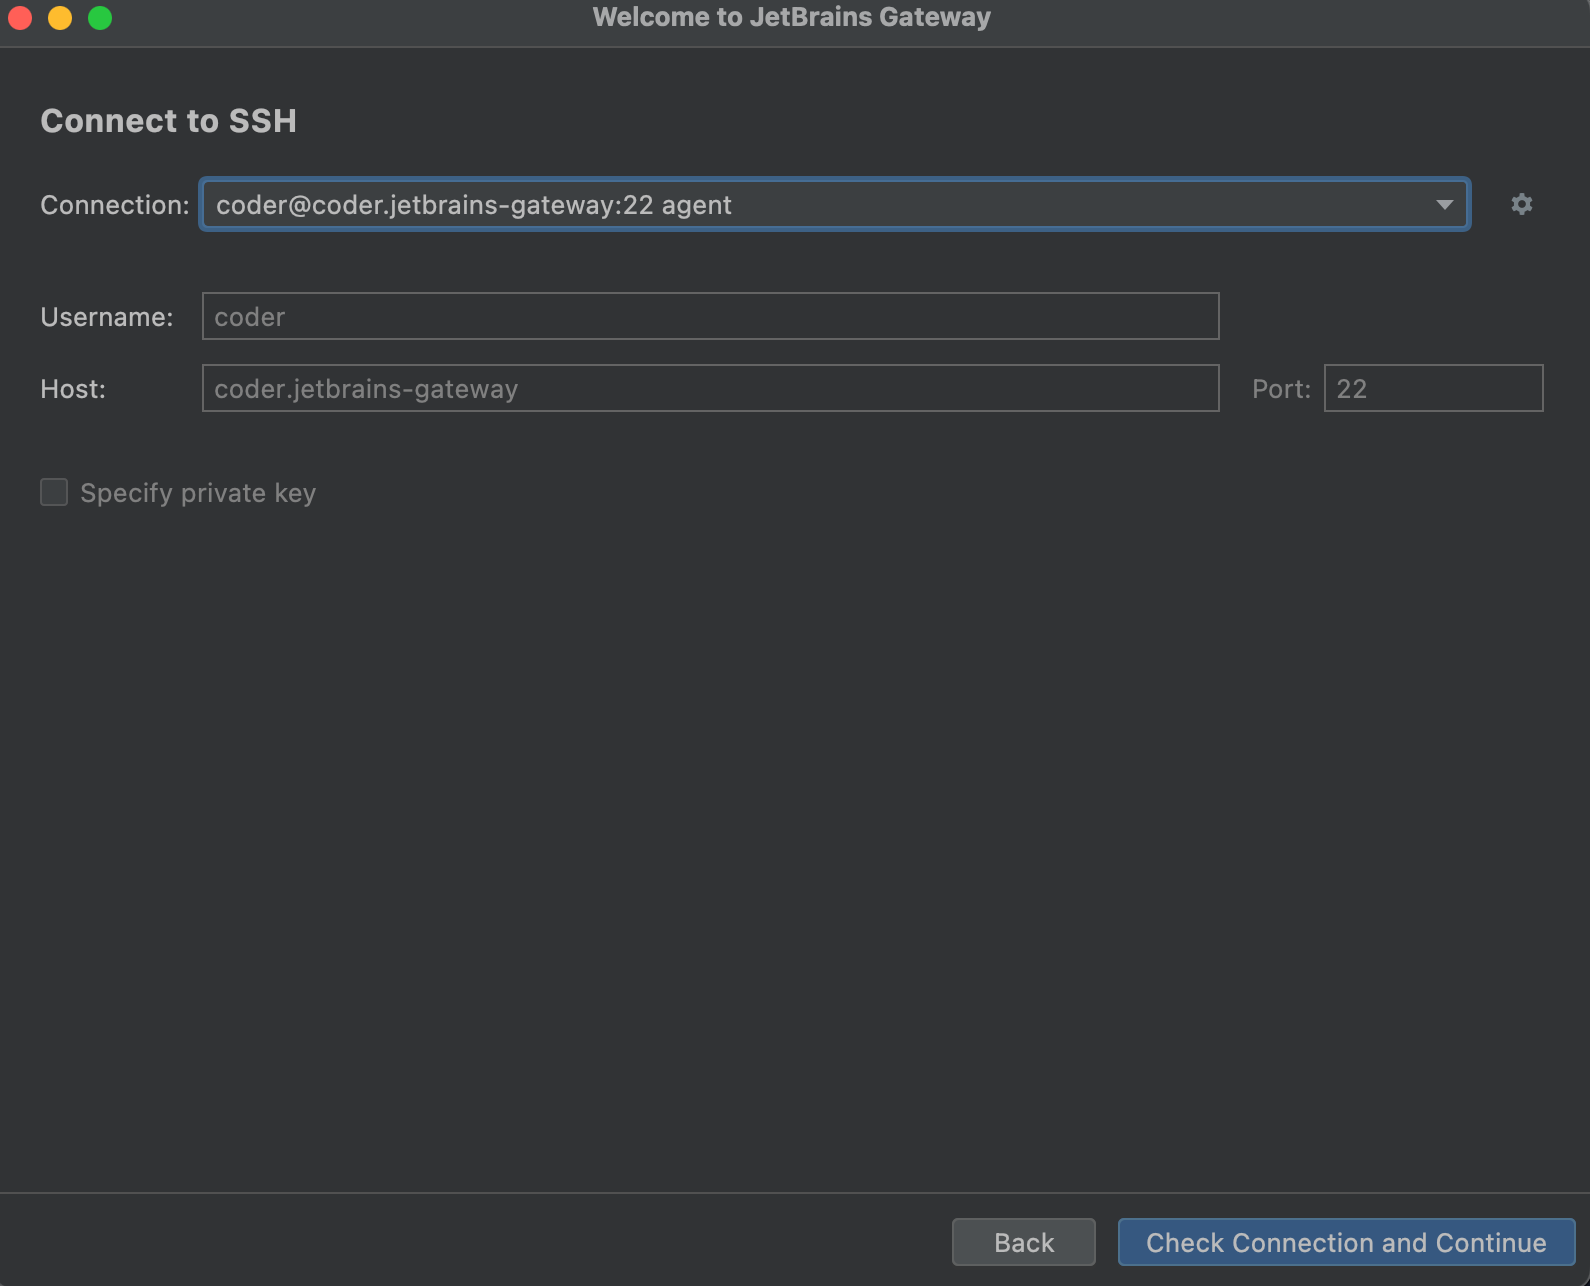
In the resulting dialog, click the gear icon to the right of "Connection:"
-
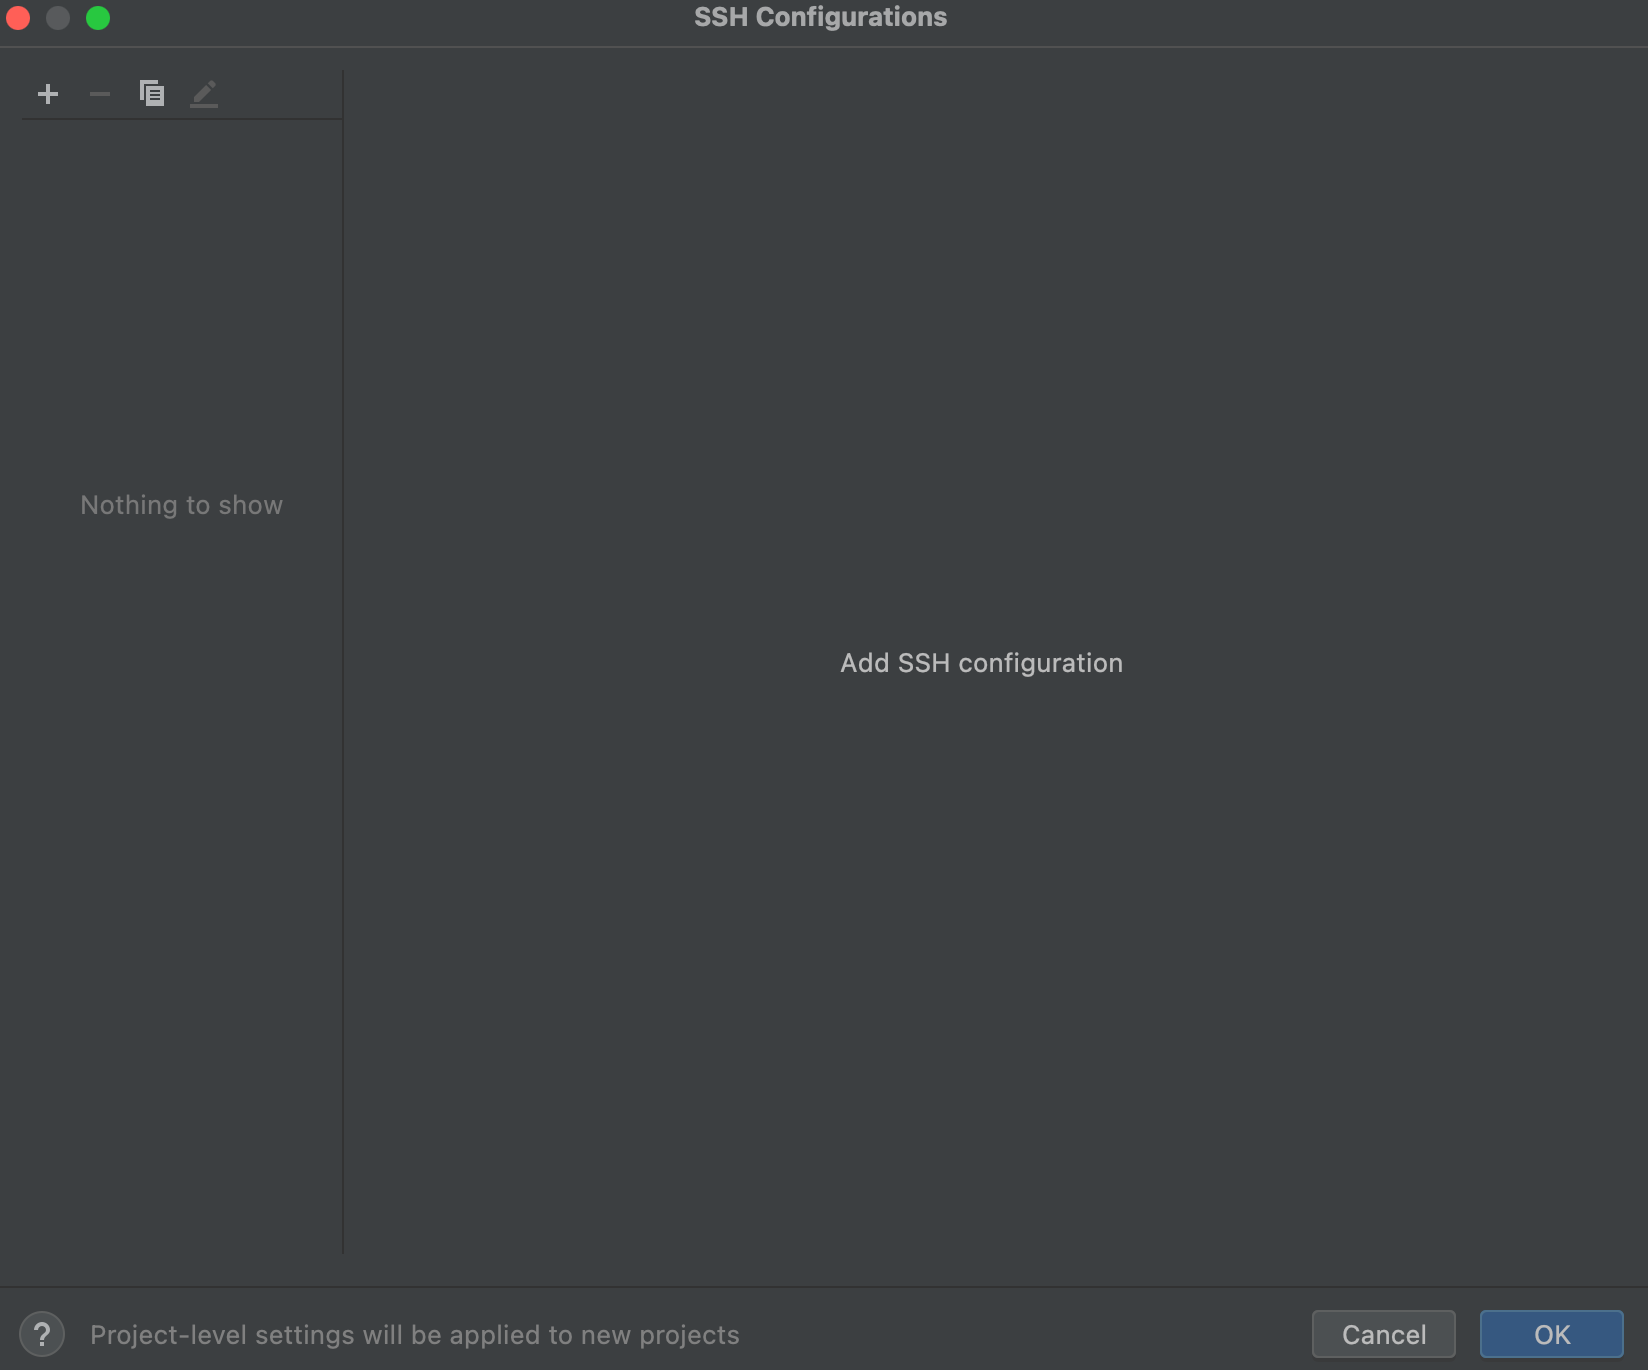
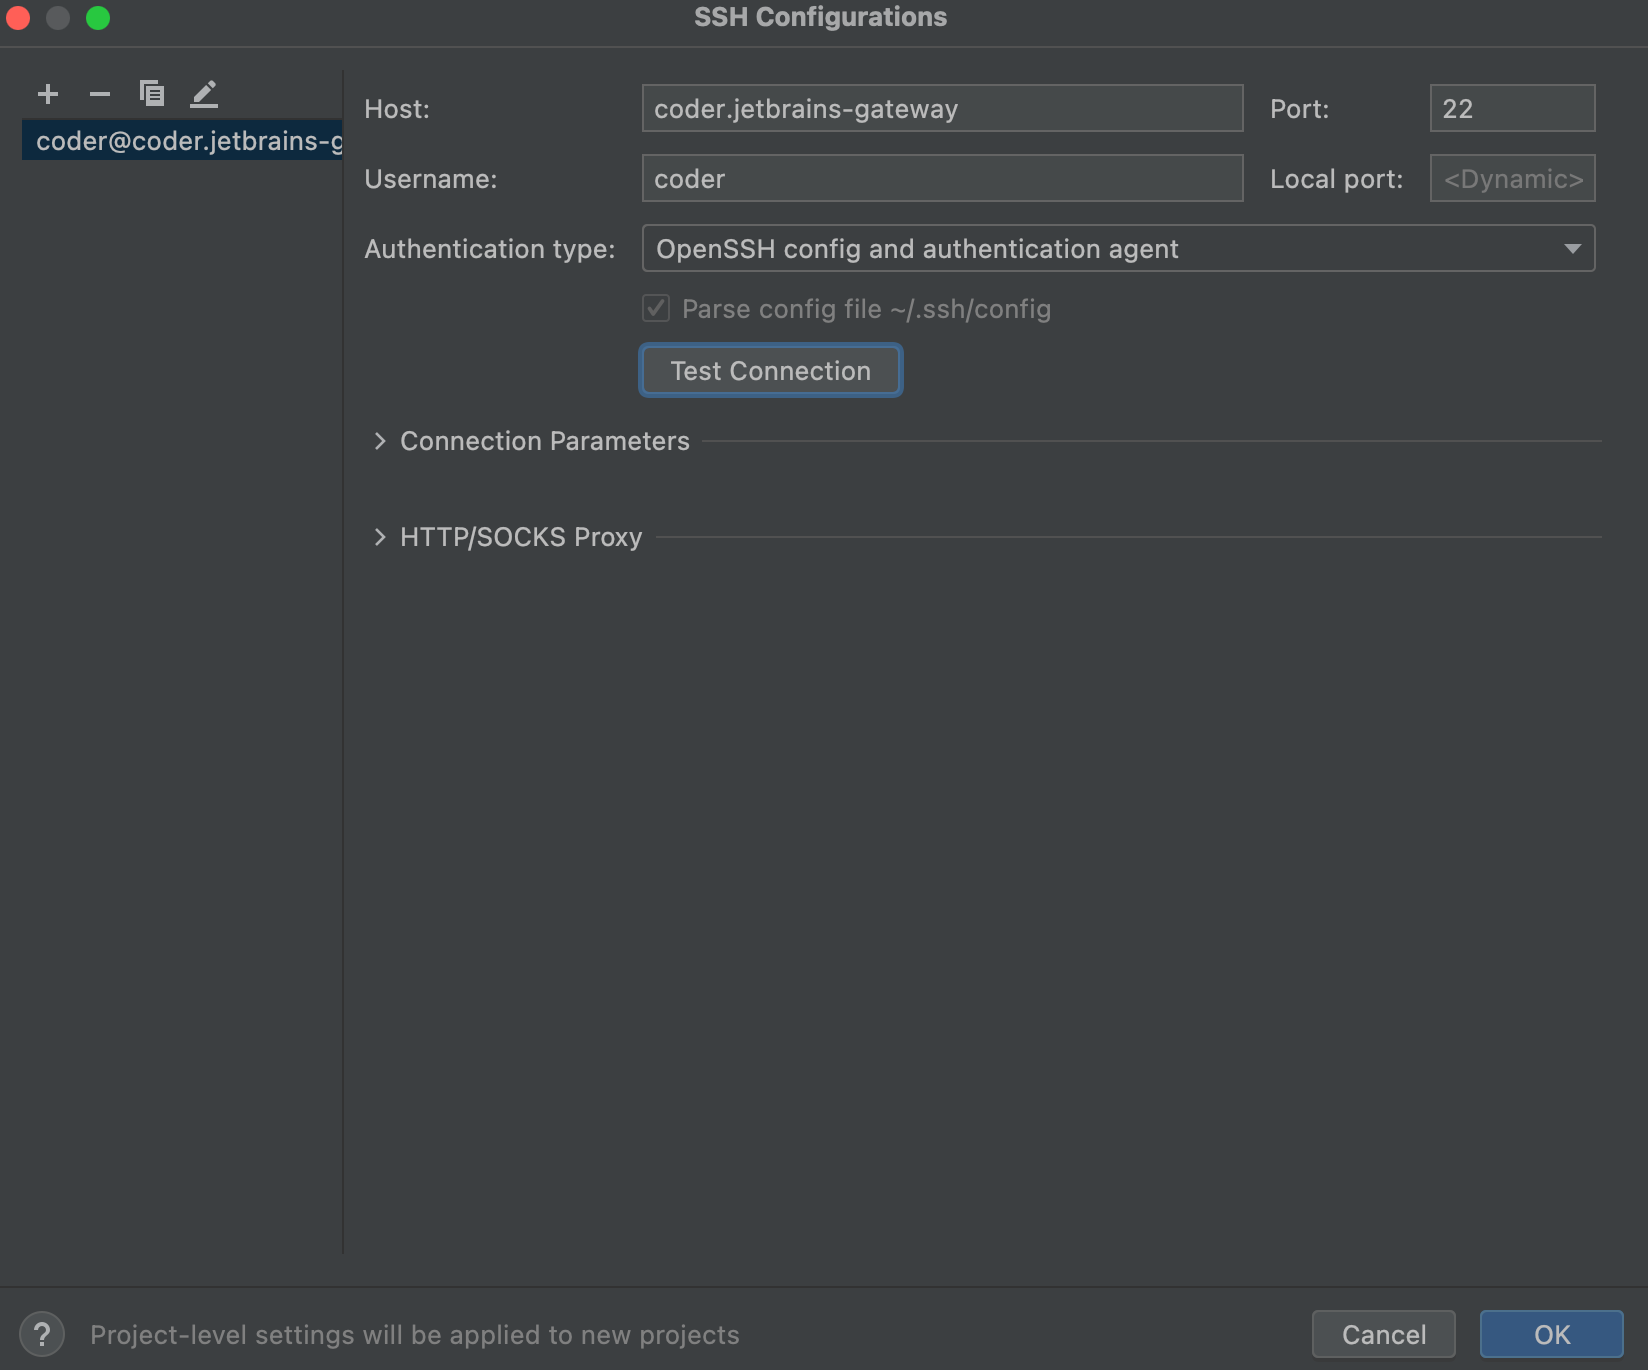
Hit the "+" button to add a new SSH connection
-
For the Host, enter
coder.<workspace name> -
For the Port, enter
22(this is ignored by Coder) -
For the Username, enter your workspace username
-
For the Authentication Type, select "OpenSSH config and authentication agent"
-
Make sure the checkbox for "Parse config file ~/.ssh/config" is checked.
-
Click "Test Connection" to validate these settings.
-
Click "OK"
-
Select the connection you just added
-
Click "Check Connection and Continue"
-
Select the JetBrains IDE for your project and the project directory. SSH into your server to create a directory or check out code if you haven't already.
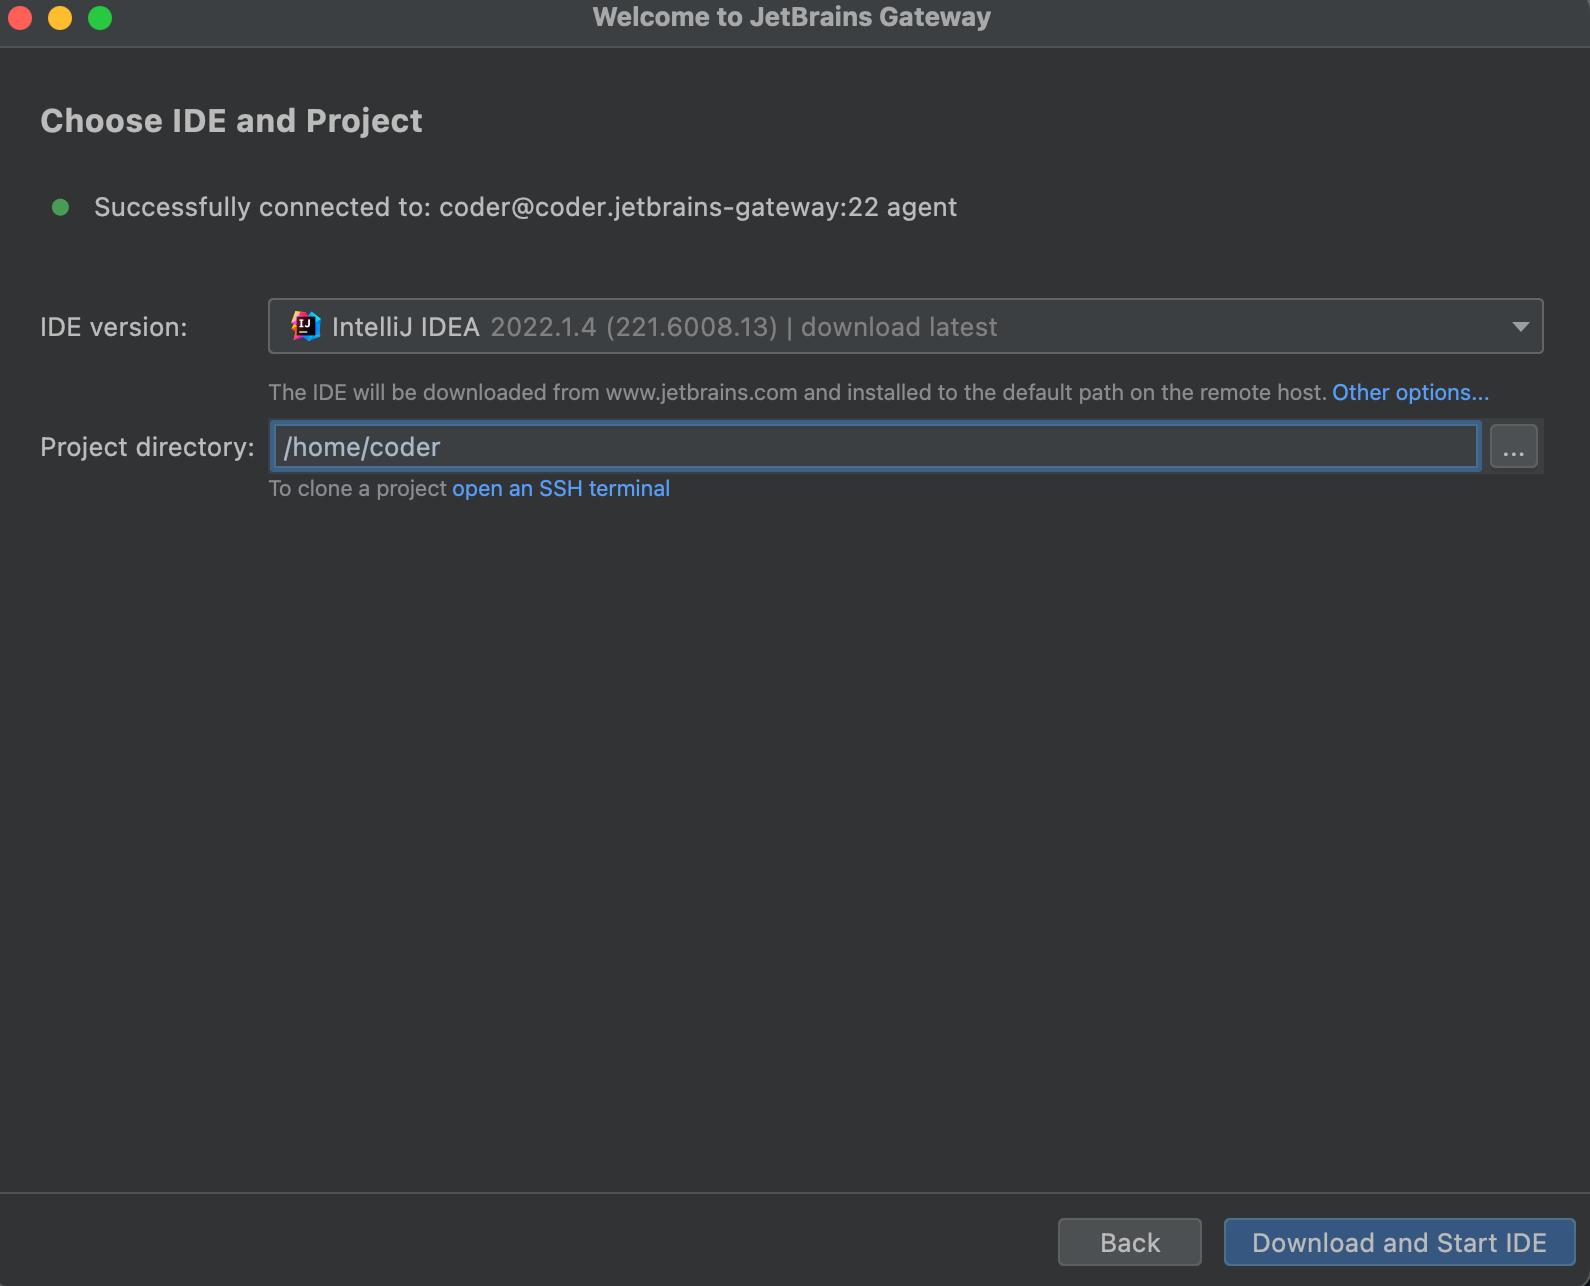
Note the JetBrains IDE is remotely installed into
~/. cache/JetBrains/RemoteDev/dist -
Click "Download and Start IDE" to connect.